This article is part of the ongoing Vi / Vim Tips and Tricks Series. As a programmer, you may do lot of repetitive tasks while coding such as:
- Adding file header
- Adding function/frame comment
- Including default code snippet
- Performing syntax check
- Reading documentation about a function
- Converting a code block to comment, and vice versa
The C-Support Vim Plugin offers easiest way to do all of the above, saving lot of time and keystrokes for C and C++ programmers.
The plugin was written by Fritz Mehner, who explains the purpose of the plugin as: “Write and run programs. Insert statements, idioms, comments”.
He also highlights following features:
- Statement oriented editing of C / C++ programs
- Speed up writing new code considerably.
- Write code and comments with a professional appearance from the beginning.
- Use code snippets
This article explains how to install the plugin in 3 easy steps and 7 powerful features of the plugin.
3 Steps to Install the C.Vim Plugin
Step 1: Download C Vim Plugin
Download the plugin from vim.org website.
$ cd /usr/src
$ wget http://www.vim.org/scripts/download_script.php?src_id=9679
Step 2: Install the C Vim Plugin
$ mkdir ~/.vim
$ cd ~/.vim
$ unzip /usr/src/cvim.zip
Step 3: Enable the plugin in the ~/.vimrc
Add the following line to the ~/.vimrc to enable the plugin for Vim editor.
$ vim ~/.vimrc
filetype plugin on
8 Powerful Features of C.Vim Plugin
Feature 1: Add Automatic Header to *.c file
When you open a file with the extension .c it opens the file with header as shown below. This will also place the cursor in the Description field in Insert mode.
$ vim myprogram.c
/*
* =================================================
*       Filename:  myprogram.c
*
*    Description:
*
*        Version:  1.0
*        Created:  01/19/09 20:23:25
*       Revision:  none
*       Compiler:  gcc
*
*         Author:  Dr. Fritz Mehner (mn), mehner@fh-swf.de
*        Company:  FH Südwestfalen, Iserlohn
*
* =================================================
*/
To change the default value of the AUTHOR and COMPANY, modify the default value in ~/.vim/c-support/templates/Templates
$ vim ~/.vim/c-support/templates/Templates
|AUTHOR|    = geekstuff
|AUTHORREF| = gk
|EMAIL|     = subscribe@geekstuff
|COMPANY|   = thegeekstuff.com
Now, when you create a new c file, it will show the modified values for AUTHOR and COMPANY as shown below.
$ vim myprogram.c
/*
* =================================================
*
*       Filename:  myprogram.c
*
*    Description:
*
*        Version:  1.0
*        Created:  01/19/09 20:26:43
*       Revision:  none
*       Compiler:  gcc
*
*         Author:  geekstuff (gk), subscribe@geekstuff
*        Company:  thegeekstuff.com
*
* =================================================
*/
Note: To add custom fields to the header, modify the ~/.vim/c-support/templates/file-description.template file and add your own custom field.
Feature 2: Adding C function using \if
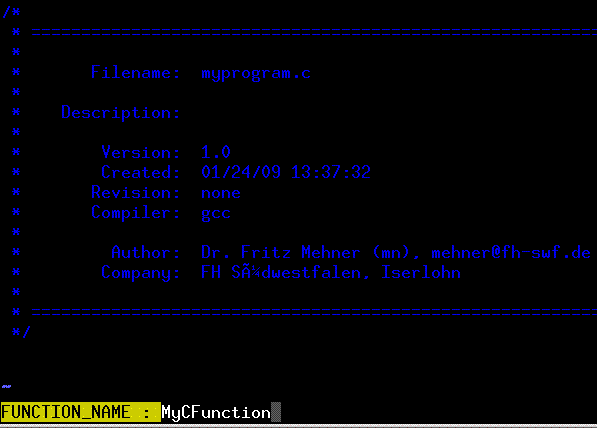
For writing a subroutine, type \if in normal mode, which will prompt for the function name (as shown in Fig1 below) and inserts the subroutine with default function content (as shown in Fig2 below).

Fig1:Insert C Function Automatically

Fig 2:Insert C Function Automatically
Feature 3: Insert main Function Header using \im
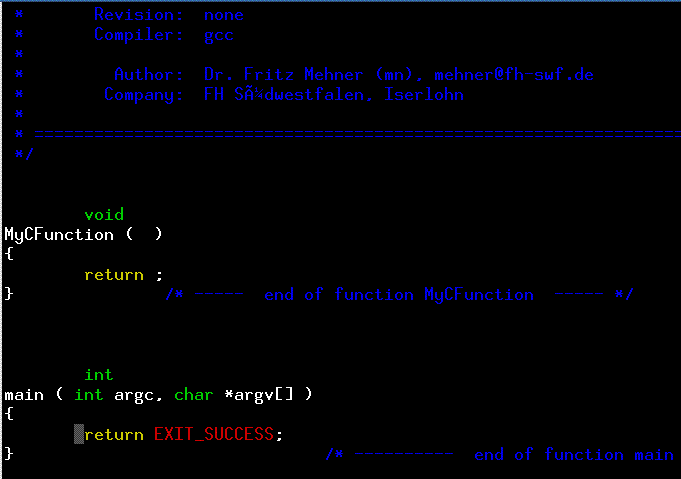
For inserting main function, type \im in normal mode, which will add the main function as shown below.

Fig 3: Insert C main function automatically
Feature 4: Insert a Function Header using \cfu
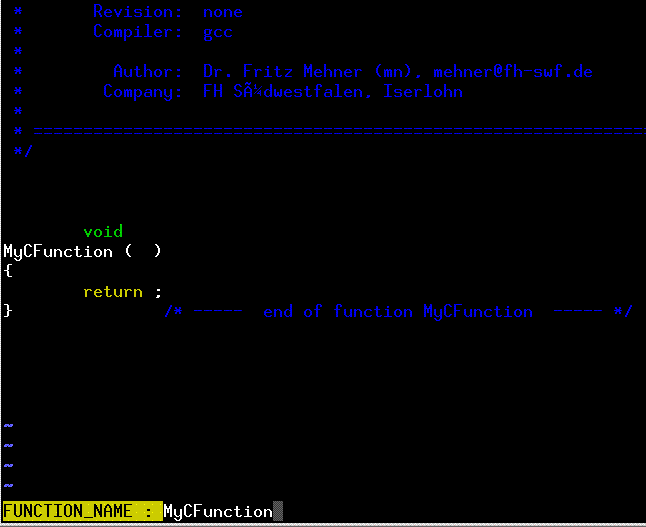
For inserting a function header, type \cfu in normal mode, which will ask the function name as shown in Fig 4, and adds the comment as shown in Fig 5.

Fig 4: Insert C Function Header Automatically

Fig 5: Insert C Function Header Automatically
Feature 5: Add a Frame comment using \cfr
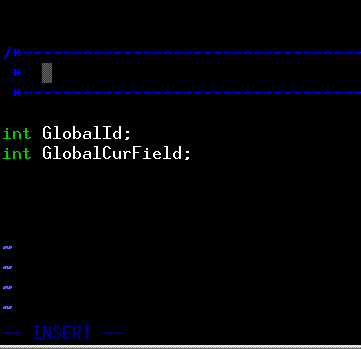
To add a frame comment, type \cfr in normal mode, which will give the following formatted comment.

Fig 6: Insert a Frame Comment Automatically
Feature 6: To include header file, use \p<
Type \p< in the normal mode, which will include the text “#include <>”, and places the cursor in the < symbol in Insert mode where you can type the header file name.
Feature 7: Save the file, compile it and execute it immediately.
To save and compile the file use \rc.
To run use \rr.
Feature 8: Insert pre-defined code-snippet to the C code using \nr
The plugin comes with few pre-defined code snippets that you can insert into your code. Following are the default code snippets that comes with the plugin.
$ ls ~/.vim/c-support/codesnippets
Makefile                        calloc_double_matrix.c  main.c   print_double_array.c.noindent
Makefile.multi-target.template  calloc_int_matrix.c     main.cc  print_int_array.c.noindent
For example, if you want to create a function that will Allocate a dynamic int-matrix of size rows*columns; return a pointer, you can re-use it from the existing code snippets. Following is the content of the calloc_int_matrix.c pre-defined code snippets.
/*
* ===  FUNCTION  ======================================================================
*         Name:  calloc_int_matrix
*  Description:  Allocate a dynamic int-matrix of size rows*columns; return a pointer.
* =====================================================================================
*/
int**
calloc_int_matrix ( int rows, int columns )
{
int   i;
int **m;
m     = calloc ( rows, sizeof(int*) );        /* allocate pointer array     */
assert( m != NULL );                          /* abort if allocation failed */
*m    = calloc ( rows*columns, sizeof(int) ); /* allocate data array        */
assert(*m != NULL );                          /* abort if allocation failed */
for ( i=1; i
m[i]  = m[i-1] + columns;
return m;
}  /* ----------  end of function calloc_int_matrix  ---------- */
To insert this into your working c program, type \nr from the normal mode inside vim, which will prompt “read snippet /home/ramesh/.vim/c-support/codesnippets/”, type calloc_int_matrix.c at the end and press enter, which will insert the content of the ~/.vim/c-support/codesnippets/ calloc_int_matrix.c to your working file automatically.
Note: You can define your own code snippets and place it under ~/.vim/c-support/codesnippets/. You can also build your own code snippets from the existing code – select the part of code need to be made as code snippet, press \nw, and give a file-name to it. From next time, type \nr and the file-name to get your custom code snippet.
There are lot of powerful features in the C-Support Vim Plugin. Read the documentation for more information. The documentation is located in the following location on your system.
- README : ~/.vim/README.csupport
- PDF : ~/.vim/c-support/doc/c-hotkeys.pdf
- Online c-support vim plugin documentation
- This plugin comes with a help file (csupport.txt) which can be viewed by :h csupport
- Additional Screenshots of this plug-in.
Recommended Reading
 Vim 101 Hacks, by Ramesh Natarajan. I’m a command-line junkie. So, naturally I’m a huge fan of Vi and Vim editors. Several years back, when I wrote lot of C code on Linux, I used to read all available Vim editor tips and tricks. Based on my Vim editor experience, I’ve written Vim 101 Hacks eBook that contains 101 practical examples on various advanced Vim features that will make you fast and productive in the Vim editor. Even if you’ve been using Vi and Vim Editors for several years and have not read this book, please do yourself a favor and read this book. You’ll be amazed with the capabilities of Vim editor.
Awesome Vim Editor Articles
Following are few awesome Vi / Vim editor tutorials that you might find helpful.
- Convert Vim Editor to Beautiful Source Code Browser for Any Programming Language
- 12 Powerful Find and Replace Examples for Vim Editor
- Vi and Vim Macro Tutorial: How To Record and Play
- Turbocharge Firefox Browser With Vim Editor Functionality Using Vimperator Add-on
Note: Please subscribe to The Geek Stuff and don’t miss any future Vi and Vim editor tips and tricks.


 My name is Ramesh Natarajan. I will be posting instruction guides, how-to, troubleshooting tips and tricks on Linux, database, hardware, security and web. My focus is to write articles that will either teach you or help you resolve a problem. Read more about
Comments on this entry are closed.
This would be a great plugin if the settings for linked libraries worked properly. I’ve tried nearly everything I can think of to set up my _vimrc using the c-support variables and no matter what libraries i set, or compiler link flags, the result of hitting F9 (\rl) is a failed compile, due to it not even adding the link flag at the end of the command line. Very frustrating in my opinion.
Great(((
After put \i I quickly found myself inside insert mode. Some people put F7 inside Firefox, and now every time I swich back from the framebuffer to X I suppose to click F7. And that’s stuff with vim. Put “i” button inside the plugin command. O-la-la.
I tried this out but unfortunately the hot-keys don’t work for me when I’m using gvim/vim in the Gnome environment. I always just end up in insert mode. The menus are there in gvim but the whole point of using vi is not using the mouse! If I use vim from the terminal the hot-keys work fine. Does anyone know how to make the hot-keys work when using gvim?
Thanks for the plugin, but i followed al the setup instructions above, but when i tried editing a *.c file with vim (am using vim 7.1.138 on Ubuntu ) an error was issued :
Error detected while processing /home/nx6cyb/.vimrc:
line 1:
E319: Sorry, the command is not available in this version: filetype plugin on
So what should i do to be able to use the plugin?
thanks.
I realise that the comment above is a year old but if anyone else gets an error about ‘command is not available in this version’ it is because Ubuntu ships with vim-tiny which is very basic.
sudo apt-get remove vim-tiny && sudo apt-get install vim
This thing has some weird dependencies and does not work properly under Debian.Too bad it sounded like a good one.
Hi,
First of all, thanks a lot for sharing such a beautiful Tips. I really like your blog.
The second thing which I want to ask is that Is there any way to disable this plugin?
Regards
#include
#include
void main()
{
float sale,price;
clrscr();
sale=500.25;
price=5.25;
float total=sale*price;
cout<< "Total Sale = "<<total;
getch();
}
Cam,
I had to source the c.vim file from my _vimrc file to get the hotkeys, e.g.:
source C:\Program Files\Vim\vimfiles\ftplugin\c.vim
every time I try to run “/rr” it gives me an e486 “pattern not found” error, I installed vim and configured the vimrc properly, has anyone encountered this before and could offer me some assistance?
Hello. Every time after \rr missing the last line every time. For example.:
scanf(“%d”,&i);
printf(“%d”,i);
printf(“END1”);
printf(“END2”);
Last END2 is not printed after \r\r but when i do :!./executable_file it works fine.
What can I do?
Thank you !
but can anyone help to change the C , C++ compiler to a specific binary ?
I use \p< to include header file,
but when I type p,vim paste what I just copy.
Not include the header file.
what should I do?
This article is outdated. The plugin on this page isn’t compatible with current versions of vim. Get the latest here: http://www.vim.org/scripts/script.php?script_id=213
Hi Ramesh,
How to run with or without using Makefile in this c.vim IDE and is it use for kernel level programming, if so how to use library files.