Even if you are regularly using Google maps, probably few of the tips mentioned below might be new to you.
1. Set Home and Work Location
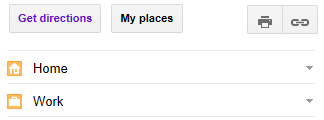
Click on “My places” (located on the top left-side) and set your “Home” and “Work” address. This way, later when you are getting a direction from your home or work, instead of typing the full address, you can just type “home” (or) “work”.
2. Save Directions to My Maps
If you have created a custom map, or a direction with multiple stops, or any other customization, you might want to save it for later use. Once you get the directions, click on the “Save to My Maps’, which is located at the bottom where it displays the text directions.

Once you’ve saved a map, you can view them later by going to “My places” -> “Maps”.
You can also create custom maps with your own notes, markers, etc. The video on this creating custom maps page explains how to use this feature.
3. Collaborate Saved Maps
You can mark your map as public or private. You can also invite your friends to collaborate and edit your custom map. This is helpful when you are planning a trip with your friends and want to collaboratively plan the direction with some stops in between.
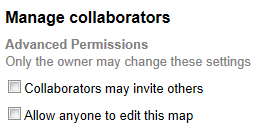
Once you’ve saved a map, go to “My places” -> “Maps” -> Select your map -> Click on “Collaborate” link on the top to manage the collaboration settings.
4. Favorite Locations
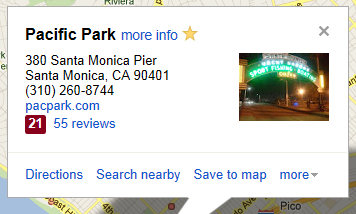
While viewing a particular location (restaurant, park, etc), you can click on the ‘star’ icon as shown below to mark it as your favorite location. Once you mark it, you can view all your favorite locations by going to “My places” -> “Starred”.
5. Switch to Street View
You can switch to a street view from few places. When you are viewing a particular location from the map (i.e from the little location info pop-up) -> click on “more” -> and select “Street view”.
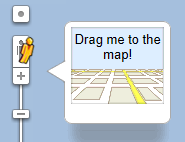
You can also click on the “Man” icon that is located on top of the “zoom” scale, and drag this man and drop it anywhere in the map to view the “street view” of that location.
After you get your directions, from the left-side text directions, you can move your mouse on a specific line item, which will display the “Man” next to it as shown below. Clicking on this man, will split the right-side map into two half. The top portion will display the street view of that particular direction, and the bottom portion will show the 2d map.
6. Customize the Print View
Once you get your directions, click on ‘Print’ icon. From this page you can perform the following customization.
You can add notes on the textarea given at the top. This is a good place to note down telephone numbers of the person you are going to meet at the destination, or reservation confirmation number, etc. This way when you print the direction, you have your custom notes along with it.
By default the print view will display the “Text only” directions. However, when you move your mouse on a particular line item in the direction (in the print view), it will show the option to display “Map” or “Street View” only for that line item. This is helpful when you want to print the “Street view” only for your destination location (and not for every turn).

7. Get Link for your Direction
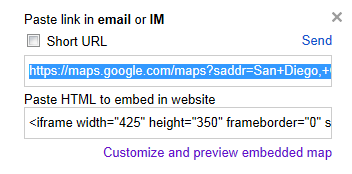
Once you get your directions, if you want to quickly email it to your friends, you can get the link for the direction by clicking on the “Link” icon that is located next to the “Print” icon on the top left side.
8. View Traffic
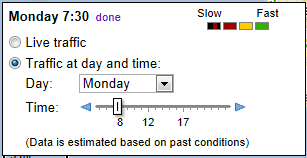
To view the traffic, on the top right-side, move your mouse to “Satellite”, which will display a drop-down list, select “Traffic” from this list. This will display the live traffic by default. If you are planning for a trip in the future date, you can approximately predit the traffic at that time by choosing your day and time of travel as shown below. This uses the traffic data from the previous day and time based on your selection.
9. Google Earth View
You can also view the “Earth View” by installing the google earth browser plugin. This will give the option to view the maps in 3D from the browser itself. Currently this plugin is available only on Windows and Mac OS. Move your mouse to the “Satellite” at the top right-side, this will also display “Earth” icon next to “Satellite”, click on this to install the Google Earth plugin.
10. Add Multiple Destinations
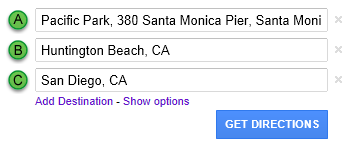
When you are planning for a trip, you can also add multiple destinations along your trip and get one route for all of these. Click on the ‘add destination’ link right below the “A” and “B” location as shown below. You can add as many destinations as you want.
11. Locations with an Icon
Any location on the map that has an icon is clickable. When you click on it, you’ll get more information on that particular location. Typically you’ll see location with an icon for parks, colleges, airports, etc.
12. Freeway Exit Numbers
At a closer zoom level, you’ll also see exit number on the freeway in the 2d map.
13. Search Nearby
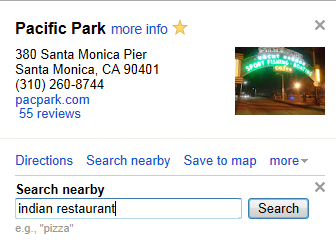
When you are viewing information about a particular location (from the little info pop-up), you can also click on ‘Search nearby’ and search for any nearby point of interest (for example, gas station, starbucks, etc.)
14. Google Map Maker
Using Google Map Maker, you can update information about your local area to the google maps. Once the update you make are reviewed and approved, it will be visible for everybody to see.
15. Moving Pane
Click on the little arrow shown at the bottom right corner, which will display a zoom pane. From here it is easy to move around the map in the current zoom level.
16. Google Maps Lab
Click on the “Maps Lab” link located on the bottom left-side. Please keep in mind all the features available in the Maps Lab are beta only.
You can enable Google maps add-ons like Distance Measurement Tool, LatLng Tooltip, etc, from here.
17. Bicycle Route
You can also get bicycle route from google maps. Click on the bicycle icon on the top left-side and get the bicycle route direction. When google maps is showing the direction in bicycle mode, the map will also show the all possible bicycle routes available around that area in the map.
18. Public Transit Route
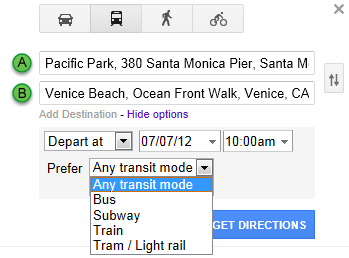
You can also map your route if you are using public transportation. Click on the public transit icon on the top, this will display the following additional option, where you can specify the date and time of your departure. You can also select the mode of your public transit (i.e bus, subway, etc.).
19. MapsGL
MapsGL is currently in beta state. This uses the WebGL technology (web-based graphics library). This will bring some 3D features to the google maps without having to install any additional plugins.
20. Street View Gallery
Google street view is not just for streets. Google maps team have used the same street view technology to capture some non-street views like Amazon river. Check-out the entire Street View collections.
If you liked this article, don’t forget to check-out the Google Search Tips and Tricks.


 My name is Ramesh Natarajan. I will be posting instruction guides, how-to, troubleshooting tips and tricks on Linux, database, hardware, security and web. My focus is to write articles that will either teach you or help you resolve a problem. Read more about
Comments on this entry are closed.
“12. Freeware Exit Numbers” =) geek one day…
Is there a way to create a “My Map” from a list of addresses rather than having to interactively plot each one?
Hi,
Thanks a lot….
It seems these tips are just for the web-based version (for PC’s), not the native Android app, although Android browsers can be used to get to the web-based version to use these tips – it just is a bit harder to use on a touch screen tablet (for me at least). One has to “resist” the urgings to use the Maps app.
Anyway, #10, “Add Multiple Destinations” (the one I really wanted to try on Android) requires manual positioning of added via points, or you will get some mile-gobbling doubling back. That is easy to do by dragging the associated letter up and down as desired for the path to follow in top-down order.
I already hsve maps how do I shoow each stop on them. ..?
great sir….
you are doing great work.
These are good tips for a noob. But I wish you’d be critical of Google and how you can’t rename your favourites. As well as it often does give you longer directions than it should. Dont get me started on the mobile map app of Google. They’re really bad and limited..