From DELL BIOS, you can view and changes several system settings. If you’ve not played around with these BIOS settings, just go to your system BIOS, view these settings to understand what they means.
For most part, you don’t have to change any of these default settings.
The screenshots below are from a DELL PowerEdge server.
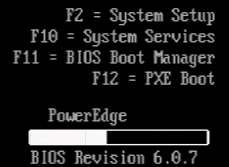
1. Press F2 to enter BIOS
When the system is starting up, press F2 to enter the system setup, which will allow you to view (or modify) the DELL BIOS settings.
2. Memory Settings
On the top, you’ll see the system time and date. You can modify these if they are not correct.
Scroll down to ‘Memory Settings’ and press Enter, which will display more details about the memory configurations of the system as shown below. This displays memory information including RAM Size, Memory type, Memory speed, Video memory size, etc.
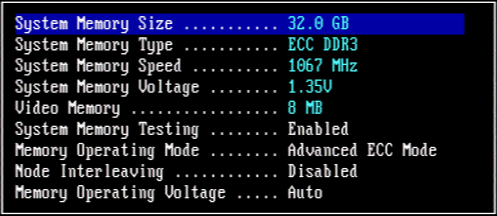
The following are some of the memory settings that can be changed from this screen. Press Space-Bar to change these values. The default values are shown in bold below.
- System memory testing: Enabled (disabled)
- Memory Operating Mode: Advanced ECC Mode (Optimizer Mode, Mirror Mode)
- Node Interleaving: Disabled (enabled)
- Memory Operating Voltage: Auto ( 1.5V )
3. Processor Settings
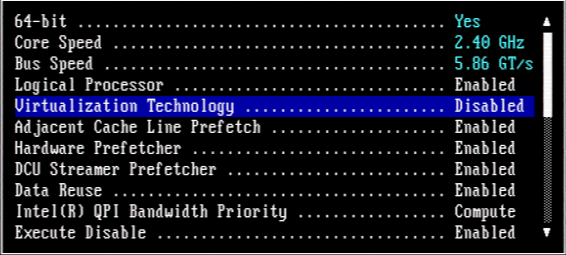
Scroll down to ‘Processor Settings’ and press Enter, which will display more details about the CPU of the system as shown below. In this example, you can see that it is 64-bit cpu, with 2.40 GHz processor speed, and bus speed of 5.86 GT/s, etc. If you are planning to install VMWare (or any virtualization server), you have to enable the “Virtualization Technology” in the CPU.
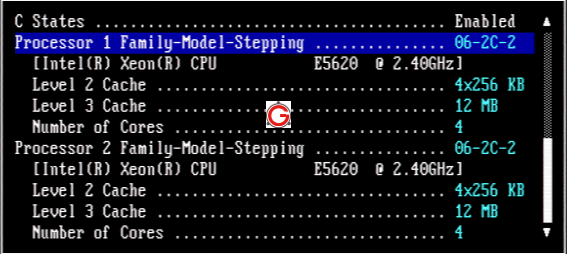
Use arrow keys to view more information about the processors. Now this shows the details about each and every processor on the system. In this example, the system has two Intel Xeon E5620 CPUs that has 4 cores each.
4. Boot Settings
Scroll down to ‘Boot Settings’ and press Enter, which will display the following boot settings menu.
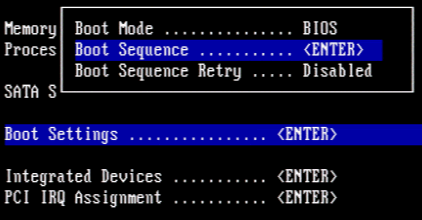
Select ‘Boot Sequence’ and press Enter, which will display boot sequence. Here it will first look for SATA optical drive, then hard drive, and then network.

5. Integrated Devices
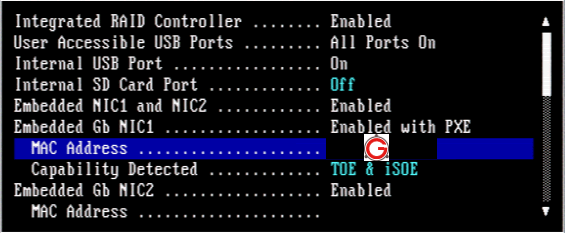
This will display information about all the integrated devices in the systems including, RAID controller, USB, SD card, Embedded NIC cards, etc. As you see below, you can also view the MAC address of your system’s Ethernet card from here.
6. IRQ Assignments
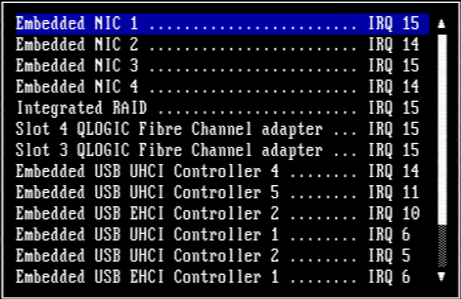
Scroll down to ‘PCI IRQ Assigments’, and press Enter to view all the IRQ number assigned to various devices as shown below.
7. Serial Communications
From here you can view information about systems serial communication ports. As you see below, serial device 1 is COM1, with remote terminal type VT100.

8. System Security
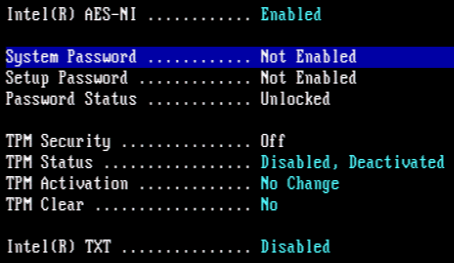
From system security menu, you can enable DELL BIOS password. There are two types of passwords you can set here. First, the system password, and next the setup password. You should at least enable DELL BIOS setup password as we discussed earlier.
9. Exit BIOS
Press ESC to exit out of the BIOS settings. If you’ve made any changes, it will prompt you with the following message. If you’ve accidentally made any changes, and didn’t want to save it, select “Discard changes and exit”.


 My name is Ramesh Natarajan. I will be posting instruction guides, how-to, troubleshooting tips and tricks on Linux, database, hardware, security and web. My focus is to write articles that will either teach you or help you resolve a problem. Read more about
Comments on this entry are closed.
I didn’t realize that I could view so much information about the system from the BIOS. Thanks.
well post……
Thanks.
lot of thank