VMware Workstation is VMware’s commercial virtualization software for x64 computers.
This is a Type 2 hypervisor, which means it is installed on top of an existing operating system running on the computer hardware called the host operating system. It can be installed on both Linux and Windows host Operating Systems.
In VMware Workstation you can set up multiple virtual machines, each with its own guest operating system, and execute them simultaneously.
Supported guest operating systems can be 32 bit or 64 bit, including most Linux distros, most versions of Windows, and other OS like FreeBSD and Solaris.
This article will show how to install VMware Workstation 10 on two popular Linux distributions, CentOS 6.4 and Ubuntu 12.04 LTS, setup virtual machines for installing guest operating systems.
I. Install VMware Workstation
Download VMware Workstation
Download the 30 day trial version of VMware Workstation from here. The full version can be purchased from the VMware online store.
VMware Workstation comes with one install file for all Linux distributions, which is a zipped .bundle file. The latest stable release of VMware Workstation is 10.0.
Launch VMware Workstation Installer
To install VMware Workstation open a Terminal and cd to the directory containing the zipped VMware Workstation install file.
Unzip the install file from the downloads directory, and give execute permission for the user.
cd Downloads

unzip VMware-Workstation-Full-10.0.0-1295980.x86_64.zip

chmod 755 VMware-Workstation-Full-10.0.0-1295980.x86_64.bundle
On CentOS 6.4, execute the .bundle as shown below:
$ su -
Password: your password

# ./VMware-Workstation-Full-10.0.0-1295980.x86_64.bundle
On Ubuntu 12.04, execute the .bundle as shown below:
$ sudo ./VMware-Workstation-Full-10.0.0-1295980.x86_64.bundle
This will launch the installation process.
Accept the license terms
First, it will display the welcome screen with the end user license agreement. Accept the license and click on “Next”.
Next, it will display another license agreement for “VMware OVF Tool component for Linux”. Accept the license and click on “Next”.

Default Values
Next, it will ask the following questions. In most cases, just select the default values.
- Check for product update on startup. Say “Yes”.
- Send anonymous system data and usage statistics to VMware. Say “No”.
- Enter the user that will initially connect to Workstation server. Type “root”.
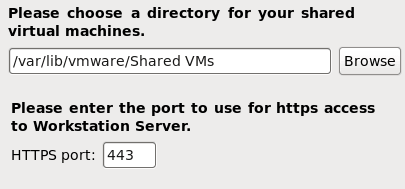
- Directory for shared viritual machines. Default at “/var/lib/vmware/Shared VMs”
- HTTPS port. Default value 443.
License Key
Since this is a trial version of the software, you can skip this step. Just leave the license key field empty, and click on “Next”.

Finish the Install
Finally it will tell you the product is ready to be installed. Click Install to begin the installation.
After few mins, it will display the “installation was successful” message. Click on the “Close” button.

II. Create Virtual Machine from Workstation
Launch VMware Workstation
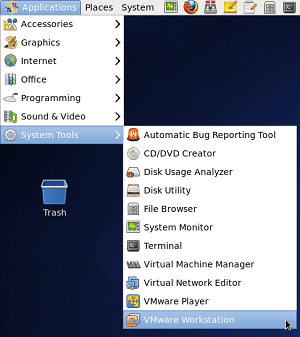
On CentOS you can launch VMware Workstation from Applications -> System Tools -> VMware Workstation.
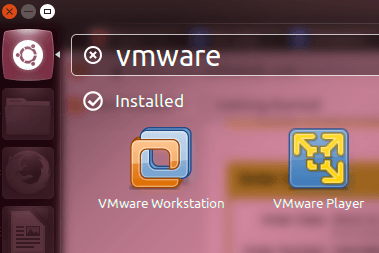
On Ubuntu you can launch VMware Workstation from the Unity Dash as shown below.
On the VMware Workstation Home screen you can choose to Create a New Virtual Machine or Open an existing Virtual Machine.
Choose Configuration Type
To create a new virtual machine click Create a New Virtual Machine on the home screen or click “File” -> New Virtual Machine.
The New Virtual Machine Wizard will launch. You can choose a Typical configuration or a Custom configuration. The default is “Typical configuration”.
Install Guest OS
You can choose to install a guest operating system now from either a physical CD/DVD drive or an ISO image, or you may choose to install the guest operating system later.
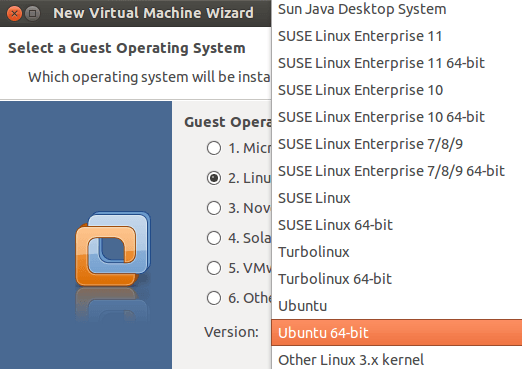
Choose Guest OS
In this example we will install an Ubuntu 12.04 guest operating system on VMware Workstation.
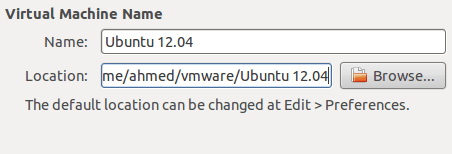
Virtual Machine Name
Specify the virtual machine name, and location. The default values will be populated automatically based on selections from previous section.
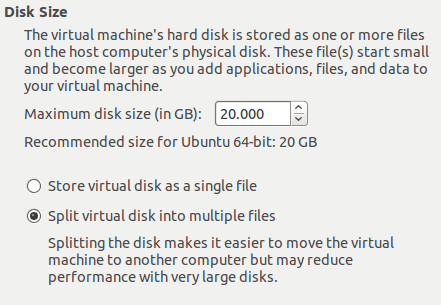
Disk Size
In this screen you can specific the disk size for this VM. Also select “split virtual disk into multiple files” radio-button.
Create VM
Finally, it will display a summary screen with all your selections to create this particular VM. Review this and click on “Finish” to create this VM.
You’ll get a “Virtual Machine Created” confirmation screen. Click on “Close”.
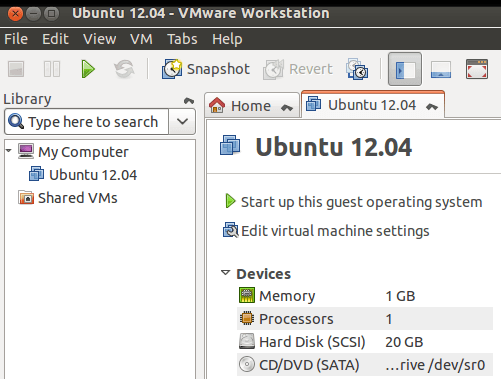
New VM Tab
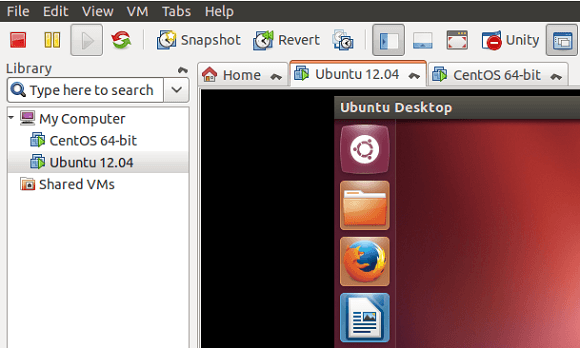
This newly created Ubuntu guest VM will get its own tab next to the Home tab as shown below.
Install Guest OS
To install the guest operating system click Edit virtual machine settings.
Here you can change various settings of the virtual machine the guest operating system will be installed on, such as Memory size etc.
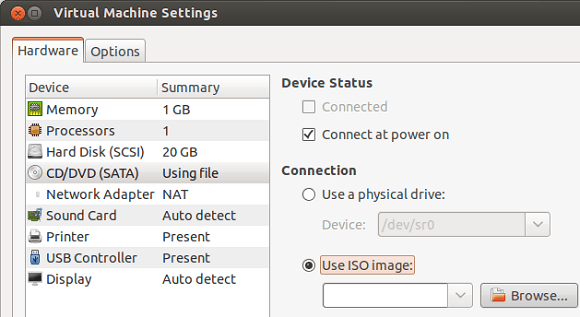
Click on CD/DVD (SATA). Make sure Connect at power on is ticked and select Use ISO image. Browse to the location of the Ubuntu ISO file and click on Open.
Click Save to save the virtual machine configuration and close the Virtual Machine Settings window, On the Ubuntu virtual machine tab click on Start up this guest operating system, and install the guest operating system. After the installation is finished and the guest operating system is started.


 My name is Ramesh Natarajan. I will be posting instruction guides, how-to, troubleshooting tips and tricks on Linux, database, hardware, security and web. My focus is to write articles that will either teach you or help you resolve a problem. Read more about
Comments on this entry are closed.
Hi,
Thanks ,
Very nice article…
Good and descriptive.
Thank you for the article.
Do you have any experience with vSphere client installations on Linux?
Andrey.
Thank you sir for this article.
can you prepare the article for cloud computing.
Thanks
Awesome post..
Great write up, this site is one of the BEST!
: )
Sorry for the interruption, but in open source world why we go through the paid software with opensource OS . is it really make a seance ? Reply is not expected.
Very helpful thanks,
With so many free VM apps, why bother installing a commercial product with a limited free trial?
Yes, VMware Workstation is not free BUT VMware Player IS!!! And I know people are using it to spin up VMDKs on CentOS for example in order to run Win etc….. So this is why.