Sometimes as a Linux Sysadmin, you might end-up in a situation where you may have to manage some Windows server as part of your virtualization strategy.
In those situations, it is good to know some fundamentals of how to manage Hyper-V virtualization on Windows.
If you like to manage the Hyper-V server from a GUI, enable the Hyper-V role on a separate Windows Server 2008 or 2012, as explained in this tutorial.
When you install Hyper-V Core edition, which is free, on a Windows server, you can manage it from that server only using the CLI.
So, installing Hyper-V manager as explained in this tutorial is an easy way to manager virtual machines on Windows environment.
1. Server Manager Dashboard
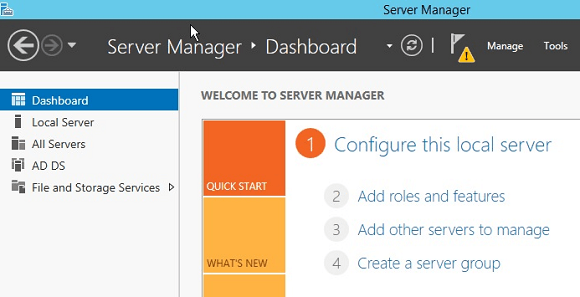
Start the Server Manager by clicking the Server Manager icon in the system tray, Click on “Add role and features”, to add Hyper-V role on this server.
2. Installation Type
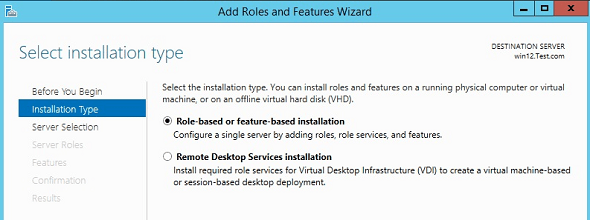
You can choose from either “Role-based or feature-based installation”, or “Remote Desktop Services Installation”.
To add the Hyper-V role, we should select “Role-based or feature-based installation” radio button.
3. Select the Server
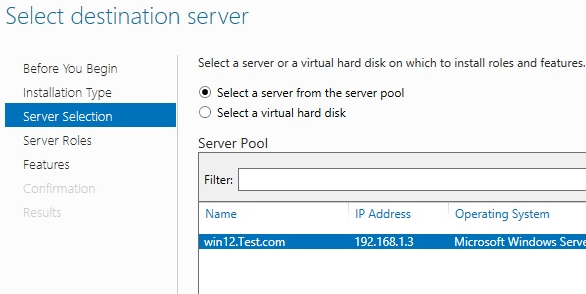
Select the server to configure Hyper-V role and press Next. Please note that this option is very helpful when you have more than one Windows server in your environment, in which case, you can also install roles and features from the local server to a remote server.
4. Select Hyper-V Role
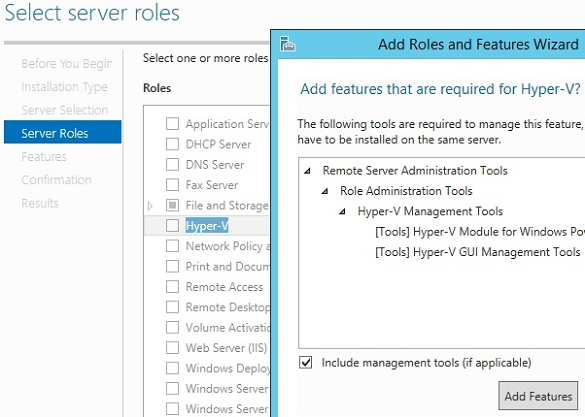
In the select server roles screen, choose Hyper-V, add features that are required for Hyper-V as shown below. If you need to install any additional features while installing Hyper-V, you can choose in next screen.
5. Virtual Switches
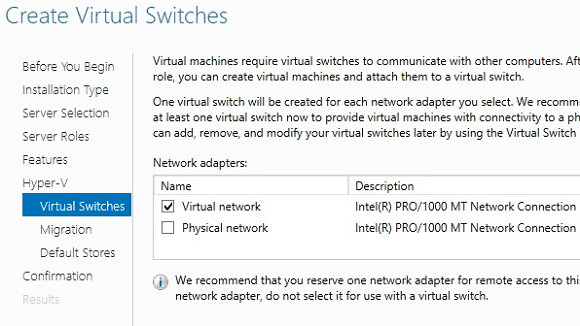
This will display a introduction page for Hyper-V, Click Next. In virtual switch screen, select the network card to for Hyper-v server as shown below.
6. Default Stores
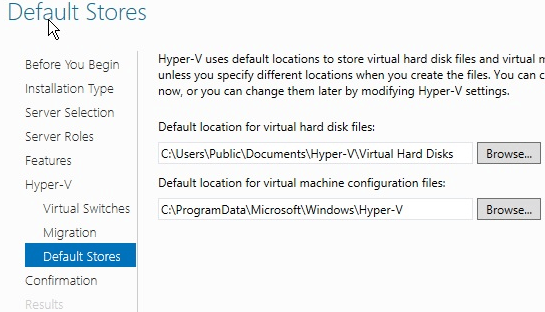
In Migration page click next to continue. In “Default Stores” page, select the default location where you want to store both virtual hard disk files and virtual machine configuration files as shown below.
7. Installation in Progress
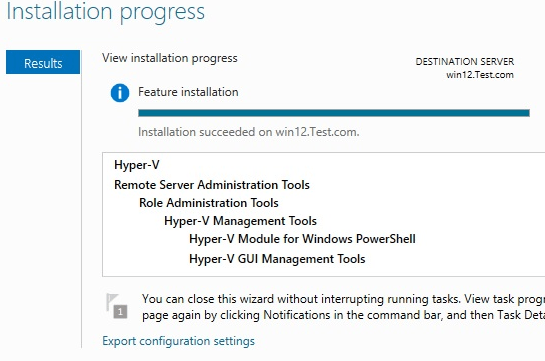
In the confirmation page, review your current selections and click next to continue. This will start adding the Hyper-V roles and related selections to the Windows Server. After the installation, when you click on “Next”, the system will reboot. Also, at the bottom of this page, there is an option for you to export the current configuration settings, which is helpful as a backup.
8. Hyper-V Manager
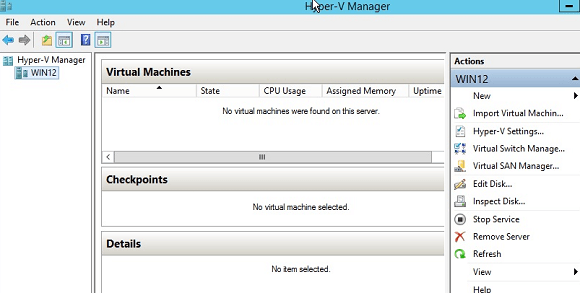
Finally, after the system reboots, you can access the Hyper-V manager from the server as shown below. From here, you can perform all typical virtualization tasks like adding a new VM, etc, from a GUI.


 My name is Ramesh Natarajan. I will be posting instruction guides, how-to, troubleshooting tips and tricks on Linux, database, hardware, security and web. My focus is to write articles that will either teach you or help you resolve a problem. Read more about
Comments on this entry are closed.
great post..helpfull..thanks for the share..!!
Good.Thanks
it is good to know some fundamentals of how to manage Hyper-V virtualization on Windows.
Handy info about Hyper V
Good going
Keep it up !!!
good jop.. samething.. new for me .. tnz to share …