Mirth Connect is an Open Source Integration Engine that is primarily used in the Health Care domain.
This support various health care standards (HL7, XML, EDI/X12, DICOM etc) that will help enterprise to integrate different systems, and let them talk to each other in a common language.
MirthConnect interface engine also supports various standard protocols (for example, TCP, HTTP, JDBS, SFTP, etc.) to connect two systems.
By default, when you install mirthconnect it uses Apache Derby as storage engine. But, it supports pretty much all popular databases including MySQL / MariaDB, PostgreSQL, Oracle and SQL Server.
In this tutorial, we’ll explain how to install MirthConnect open source software, and configure it to talk to MySQL database on Linux platform.
The following connectors and formats supported in the open source version:
- Connectors: TCP, MLLP, HTTP, FTP, DICOM, SOAP, SQL, JMS, File System, HTTPS, POP3, IMAP, ASTM, RS232
- Formats: XML, HL7, DICOM, NCPDP, X12, Delimited Text, Raw Binary
Recently NextGen acquired mirthconnect. The commercial version supports few additional formats such as CCD, C-CDA, ASTM. Also, the commercial version has some advanced enterprise extensions. For example: SSL Manager, Role-Based Access Control, Advanced Alerting, Channel History, LDAP Authentication, HL7 Message Generator.
In this tutorial, we’ll be explain how to install the open source version of Mirth Connect on MySQL database.
Step 1: Pre-Req: Install Java JDK
Make sure you have JDK 1.8 installed on your system as shown below.
# java -version
openjdk version "1.8.0_102"
OpenJDK Runtime Environment (build 1.8.0_102-b14)
OpenJDK 64-Bit Server VM (build 25.102-b14, mixed mode)
If you don’t have JDK installed, use yum to install it as shown below:
yum -y install java-1.8.0-openjdk
You should see the following JDK related packages installed on your system:
# rpm -qa | grep -i jdk
java-1.8.0-openjdk-headless-1.8.0.102-1.b14.el7_2.x86_64
java-1.8.0-openjdk-1.8.0.102-1.b14.el7_2.x86_64
java-1.8.0-openjdk-devel-1.8.0.102-1.b14.el7_2.x86_64
Step 2: Install MySQL/MariaDB
As mentioned earlier, by default mirthconnect comes with Apache Derby as default database.
But, in this tutorial, we’ll install and configure MySQL / MariaDB database, and use that for mirthconnect.
Install MySQL / MariaDB server as shown below. For this, you should install the following two mariadb packages.
yum install mariadb

yum install mariadb-server
Note: If you are using a older version of Linux distro, where mariadb-server package is not available in the yum repository, then install the mysql-server package as shown below.
yum install mysql-server
Once MariaDB is installed, you’ll see the following packages on your system:
# rpm -qa | grep -i maria
mariadb-5.5.50-1.el7_2.x86_64
mariadb-server-5.5.50-1.el7_2.x86_64
mariadb-libs-5.5.50-1.el7_2.x86_64
Once mariadb is installed, start it and make sure it is running properly.
systemctl start mariadb

systemctl status mariadb
You also may want to run the following to setup some security settings for your MySQL/MariaDB installation. This will also assign a root password for your database.
/usr/bin/mysql_secure_installation
Step 3: Create MySQL database for MirthConnect
Let us create a database called “thegeekstuff”, which will be used by the mirthconnect installation.
For this, use the mysql command with mysql’s root username and password as shown below.
# mysql -u root -pMySQLRootPwd
MariaDB [(none)]> create database thegeekstuff;
Once the database is created, create a user called “thegeekstuff”, and assign a password for this. This account will be used in the mirthconnect configuration to talk to the database.
MariaDB [(none)]> grant all on thegeekstuff.* to 'thegeekstuff'@'localhost' identified by 'DBSecretPwd!' with grant option;

MariaDB [(none)]> flush privileges;
At this stage, you’ll not see any mirthconnnect related tables in this database. But, once you’ve installed mirthconnect, you’ll see multiple tables here.
# mysql -u root -pMySQLRootPwd
MariaDB [(none)]> use sysadmin;
Database changed
MariaDB [sysadmin]> show tables;
Empty set (0.00 sec)
Step 4: Download and Install Mirth Connect
Download mirthconnect from here.
You can install mirthconnect using any one of this format: 1) RPM 2) tar.gz 2) Installer
For this tutorial, we’ll be using the tar.gz format of the mirthconnect install.
First, get the download link for the tar.gz, and use wget command to it to your server as shown below.
cd ~
wget http://downloads.mirthcorp.com/connect/3.4.2.8129.b167/mirthconnect-3.4.2.8129.b167-unix.tar.gz
Once it is downloaded, untar it as shown below.
tar xvfz mirthconnect-3.4.2.8129.b167-unix.tar.gz
By default, this will create the “Mirth Connect” directory under your current directory.
To manage this better, move this to the /opt directory, and also remove the “space” in the name, and make it all lowercase, which is easier to manage in Linux environment.
In this example, we’ll rename “Mirth Connect” to “mirthconnect”, and at the same time move it to /opt directory as shown below.
mv Mirth\ Connect/ /opt/mirthconnect
Note: If you like to install it from RPM file, then do the following:
cd ~
wget http://downloads.mirthcorp.com/connect/3.4.2.8129.b167/mirthconnect-3.4.2.8129.b167-linux.rpm
Install the RPM mirthconnect file using rpm command as shown below:
rpm -ivh mirthconnect-3.4.2.8129.b167-linux.rpm
Step 5: Modify MirthConnect Config Files
The main mirthconnect properties file is mirth.properties located under /opt/mirthconnect/conf directory.
vi /opt/mirthconnect/conf/mirth.properties
In this file, modify the following parameters:
http.port = 8080
https.port = 8443
database = mysql
database.url = jdbc:mysql://localhost:3306/thegeekstuff
database.username = thegeekstuff
database.password = DBSecretPwd!
In the above:
- http.port – 8080 is the default mirthconnect HTTP port. You can change this value to match your environment.
- https.port – 8443 is the default mirthconnect HTTP port. You can change this value to match your environment.
- database – By default this will say derby. Change this value to mysql as shown above.
- database.url – Since we are using MySQL database, set this database.url to the value shown above. By default this will point to the default derby database. Change this value. Make sure at the end of the url, it has the mysql database name that you created earlier. If you are copy/pasting this value from the configuration file comment lines, it will have mirthdb here. You should change this to your databasename.
- database.username – Set this to the mysql user that we created earlier.
- database.password – Set this value to the corresponding password for your mysql username.
Step 6: Start MirthConnect
Now, start the mirthconnect as a service using mcservice command.
# /opt/mirthconnect/mcservice start
Starting mcservice

# /opt/mirthconnect/mcservice status
The daemon is running.
You can also do a ps and check for the “mcservice” process that is running in the background as shown below.
# ps -ef | grep mcservice
root     26665     1  0 07:41 pts/2    00:01:57 /usr/bin/java -Dinstall4j.jvmDir=/usr
  -Dexe4j.moduleName=/opt/mirthconnect/mcservice -Dinstall4j.launcherId=144
  -Dinstall4j.swt=false -server -Xmx256m -Djava.awt.headless=true -Di4j.vmov=true
  -Di4j.vmov=true -Di4j.vpt=true
  -classpath /opt/mirthconnect/.install4j/i4jruntime.jar:/opt/mirthconnect/mirth-server-launcher.jar
  com.install4j.runtime.launcher.Launcher start
  com.mirth.connect.server.launcher.MirthLauncher false false
  true true false  true true 0 0  20 20 Arial 0,0,0 8 500
  version 3.4.2.8129.b167 20 40 Arial 0,0,0 8 500 -1
Note: When you start mirthconnect for the 1st time, it will connect to MySQL database, and create all the required tables.
Now, if you connect to mysql, you’ll see it has created 13 new tables that are required for mirthconnect to run properly.
MariaDB [thegeekstuff]> show tables;
+-----------------------+
| Tables_in_thegeekstuff|
+-----------------------+
| ALERT                 |
| CHANNEL               |
| CHANNEL_GROUP         |
| CODE_TEMPLATE         |
| CODE_TEMPLATE_LIBRARY |
| CONFIGURATION         |
| D_CHANNELS            |
| EVENT                 |
| PERSON                |
| PERSON_PASSWORD       |
| PERSON_PREFERENCE     |
| SCHEMA_INFO           |
| SCRIPT                |
+-----------------------+
13 rows in set (0.00 sec)
Step 7: Add Mirthconnect to Systemd
If you are running CentOS 7 (or RedHat), then you may want to add mirthconnect to the systemd startup.
For this, create the following mirthconnect.service file
# vi /usr/lib/systemd/system/mirthconnect.service
[Unit]
Description=MirthConnect
After=network.target

[Service]
Type=forking

User=root
Group=root
ExecStart=/opt/mirthconnect/mcservice start
ExecStop=/opt/mirthconnect/mcservice stop
ExecRestart=/opt/mirthconnect/mcservice	restart

TimeoutSec=60

[Install]
WantedBy=multi-user.target
Note: If you’ve installed mirthconnect as a different user other than root, then change the User and Group in the above file accordingly.
After that you can use systemctl to start and stop mirthconnect as shown below.
systemctl start mirthconnect

systemctl stop mirthconnect
To make it start automatically when the server is rebooted, enable this systemd server for startup as shown below.
systemctl enable mirthconnect
Step 8: Login to MirthConnect Administrator
You can use either the following HTTP or HTTPS url:
- http://{your-ip-address}:8080
- https://{your-ip-address}:8443
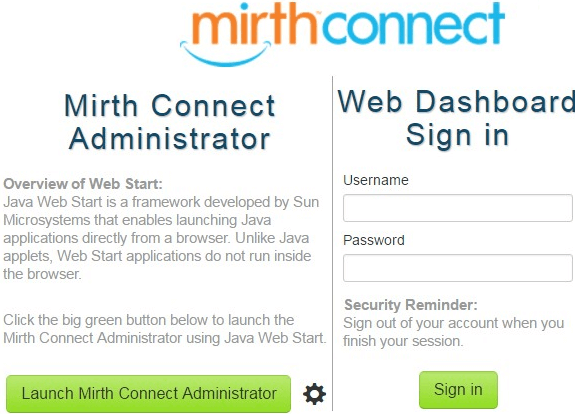
The Mirth Connect UI will have the following two options:

- MirthConnect Administartor – This will launch the administrator UI using java webstart.
- Web Dashboard Sign in – If you launched the URL with http, this will display “Access Secure Site” button. Click on that to just use mirthconnect from the browser. If you use the HTTPS url, this will show the username and password textbox here.
The default mirthconnect username and password is admin/admin.
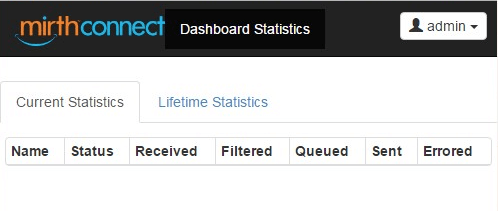
The following is the screenshot of the Mirth Connect Web Dashboard:

When you click on “Launch mirthconnect administrator” webstart button, this will download a file called “webstart.jnlp” to your system. Double click on this to launch the webstart.
First time, this will launch a dialog saying “Verifying application”. This will also show which mirthconnect it is starting by showing the full URL of the mirthconnect location this is launching.
Next, Java will display a warning message and ask you “Do you want to run this application”. Click on “Run”. This will finally display the following mirthconnect login box. The server column will by default be populated with the correct URL. If you don’t see proper values here, enter this: https://{your-ip-address}:8443
Enter the username and password. When you do it for the first time, the username and password is admin.
First time when you login, this will force you to change the admin password.
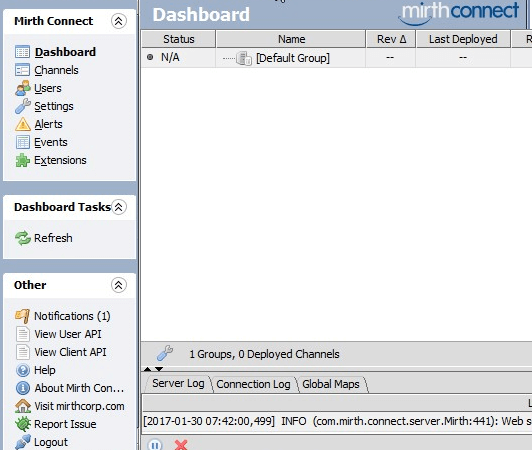
Finally, this will display the Mirthconnect Administrator Dashboard as shown below, from here you can manage the mirthconnect by creating and managing channels.

Troubleshooting Mirth Connect Startup Issues
If mirthconect doesn’t start properly, check the following mirth log files for any issues.
tail -100 /opt/mirthconnect/logs/mirth.log
Also, for debugging purporse, you may want to temporarily disable firewalld and selinux to make sure that they are not blocking mirthconnect for some reason.
To stop the firewalld, do the following:
systemctl stop firewalld
Temporarily disable SELinux as shown below:
setenforce 0
After that, start the mirthconnect again and see if it starts properly.
Mirth Connect Directory Structure
By default, under the install directory of /opt/mirthconnect, you’ll see the following directories:
- conf – All mirthconnect configuration files will be here
- webapps – This is the directory that is exposed by the mirthconnect websserver to host webapps
- server-lib – All the mirthconnect server library files will be here
- public_html – Directory exposed by mirthconnect webserver to host html files
- manager-lib – This directory will hold all the libraries that is used by Mirthconnect Server Manager
- extensions – All the libraries and meta data used by your plug-ins and connectors will be here
- docs – Document directory
- custom-lib – In this directory, as the name suggests, you can place all your custom library files. These libraries will be loaded to the mirthconnect server during startup.
- cli-lib – Mirthconnect command line interface libraries will be in this directory
- client-lib – This will have the mirthconnect administrator libraries
Apart from the above directory, you’ll also see the following Files:
- mcservice.vmoptions and mcserver.vmoptions – Java memory settings for Mirthconnect
- mcservice – Used to start, stop and view the status of Mirth Connect Service Deamon
- mcserver – If you are not using the service option, use this to start Mirth Connect in a non-service mode.
- mcmanager – This is mirthconnect server manager
- mccommand – Mirthconnect command line utility
- mirth-server-launcher.jar, mirth-manager-launcher.jar, mirth-cli-launcher.jar – Jar files used by mirth connect server, manager and cli respectively


 My name is Ramesh Natarajan. I will be posting instruction guides, how-to, troubleshooting tips and tricks on Linux, database, hardware, security and web. My focus is to write articles that will either teach you or help you resolve a problem. Read more about